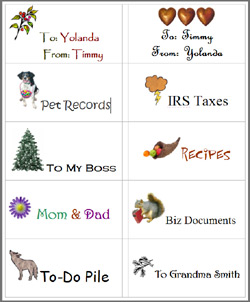
Create Labels
Label your gifts, boxes, file folders, business records, general paperwork, recipes, and more. Make holiday stickers or gift tags, personalized name tags or book plates.

Making Labels using Microsoft Word 2003
1. Open a new Word document.
2. Type in the text you want for your first label.
3. Position your cursor before the first letter of your text.
4. From the top menu bar click on Insert, scroll to Picture, and select From File…
5. The “Insert Picture” menu will appear. Locate your image and double click on it to insert it in your label.
6. From the top menu bar, click on Edit and choose Select All to highlight your label.
7. Again, from the top menu bar, click on Tools and choose Envelops and Labels...
8. In this menu you'll see your text and image inserted in the "Address" box. This is good. Don't worry if it doesn't look correct in this box.
Also in this menu, make sure "Full page of the same label" is selected in the "Print" box.
Then, click on the Options button to the right.
9. In the "Label Options" menu, make sure the following is selected:
- For “Printer Information” select Laser and ink jet
- For “Label products” select Avery standard
- For “Product number” select the Avery label product number you are using.
Click OK. You will be returned to the Envelops and Labels menu.
10. Click on New Document and your labels should be ready to print.
IMPORTANT: If the table grid lines are not visible, go to “Table” in the top menu and select Show Grid lines to display the borders around each label.
To Make Each Label Unique
Change the Font & Size
Highlight your text and experiment with font and size.
You can add spaces, center text -- do whatever you want. Just stay within your table grid lines.
Insert Different Images in Each Label
Highlight your image, go to the top menu bar and click on Insert, scroll to Picture, and select From File…
The “Insert Picture” menu will appear. Locate your image and double click on it to replace the existing image with another.
Resize Your Image
Click on your image to highlight it Grab the image by the corner by clicking and dragging it to the size you want
Don’t forget to Print Preview and practice on scratch paper first. Don't waste your Avery labels until you're sure!
Avery.com has a Design & Print section where you can download label templates and upload your own images. It requires that you register, but is easy to use and you have lots more image layout options.
NOTE: If you are going to use Cat's Clips images on Avery.com, remember to download the images on your computer first.


 Free Clip Art
